After being on the road for a year, we know that the stock headlights on the Promaster leave a lot to be desired. We have experimented with upgrading our high and low beams to LED, which does provide an increase in visibility, however, we still wanted to be able to see better at night when traveling along dark forest roads when we fail to find a camp spot before dark.
I knew I could install a lightbar and couldn’t find anyone that documented the process. I am not an expert, but I feel like it turned out looking good and wanted to share our experience in hopes of helping others looking to do the same.
⚠️ Safety First
Always disconnect the battery before working with electrical components.
Tools & Materials Needed
Tools:
- T30 Torx bit
- Step drill bit
- Hacksaw (or Dremel for cleaner cuts)
- Wire strippers/crimpers
- Drill and bits
Materials:
- 31” LED lightbar
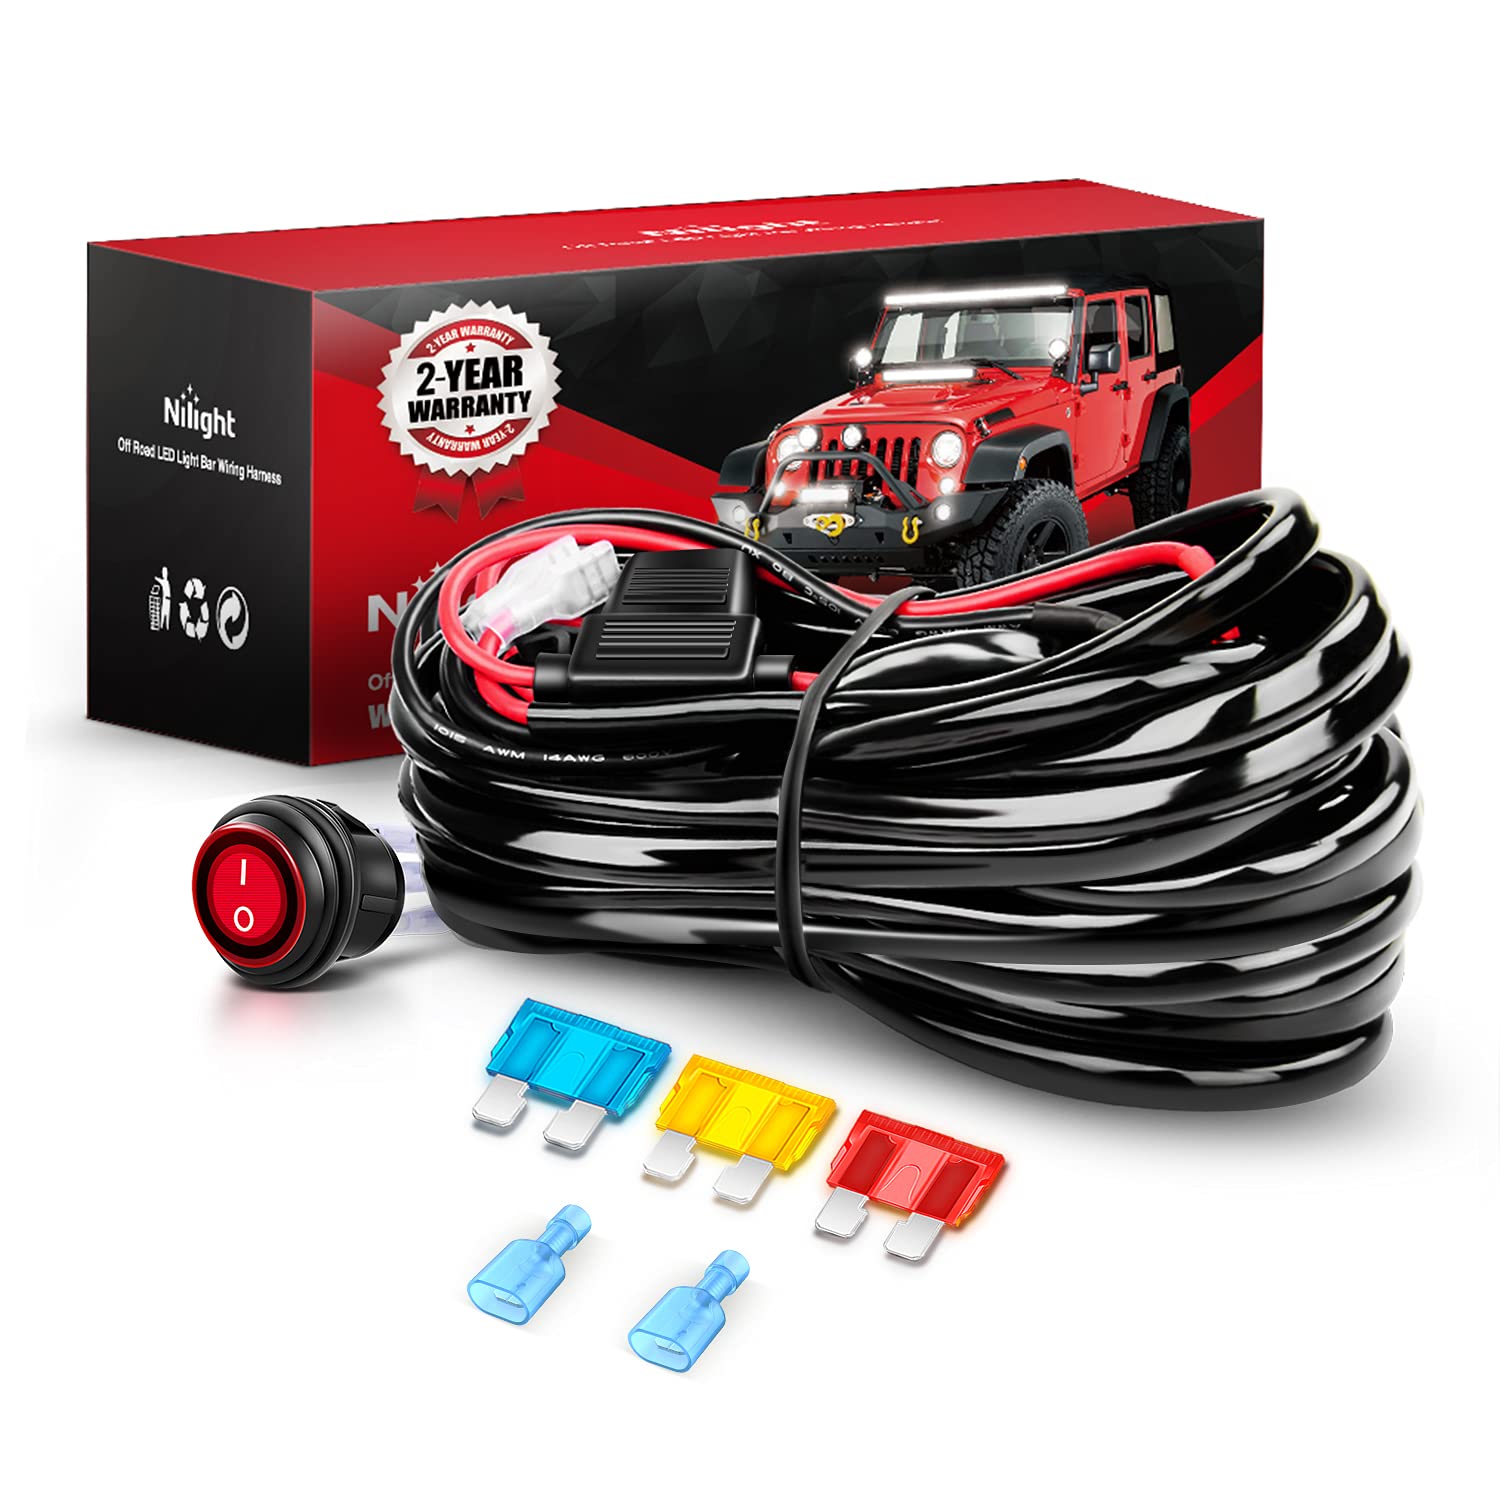
- Wire harness kit
- Butt connectors with heat shrink
- Electrical tape
- Zip ties
- Shorter bolts and nuts (for mounting)
- Touch-up paint (for exposed metal)
Time needed: Approximately 4-6 hours
Identify location for install
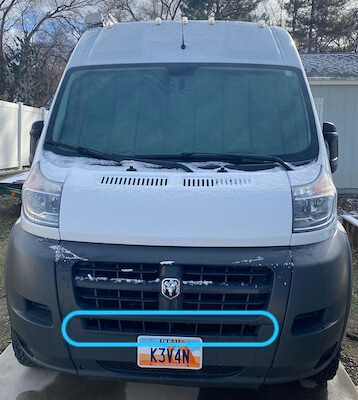
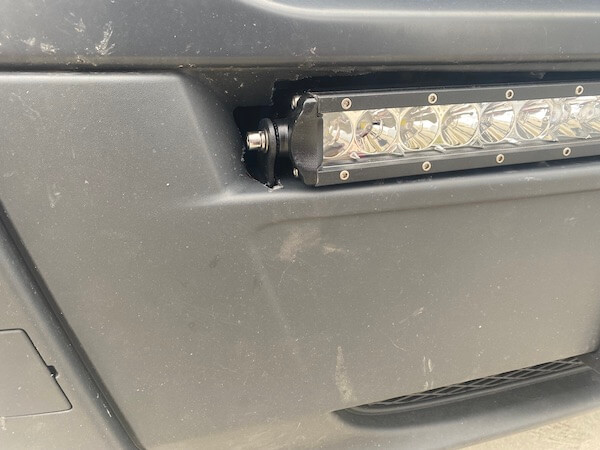
I decided to install the lightbar recessed into the front paneling. I noted that the bumper aligns perfectly with the bottom opening of the grill. The opening seems like it would fit a 30-32 inch light bar nicely.
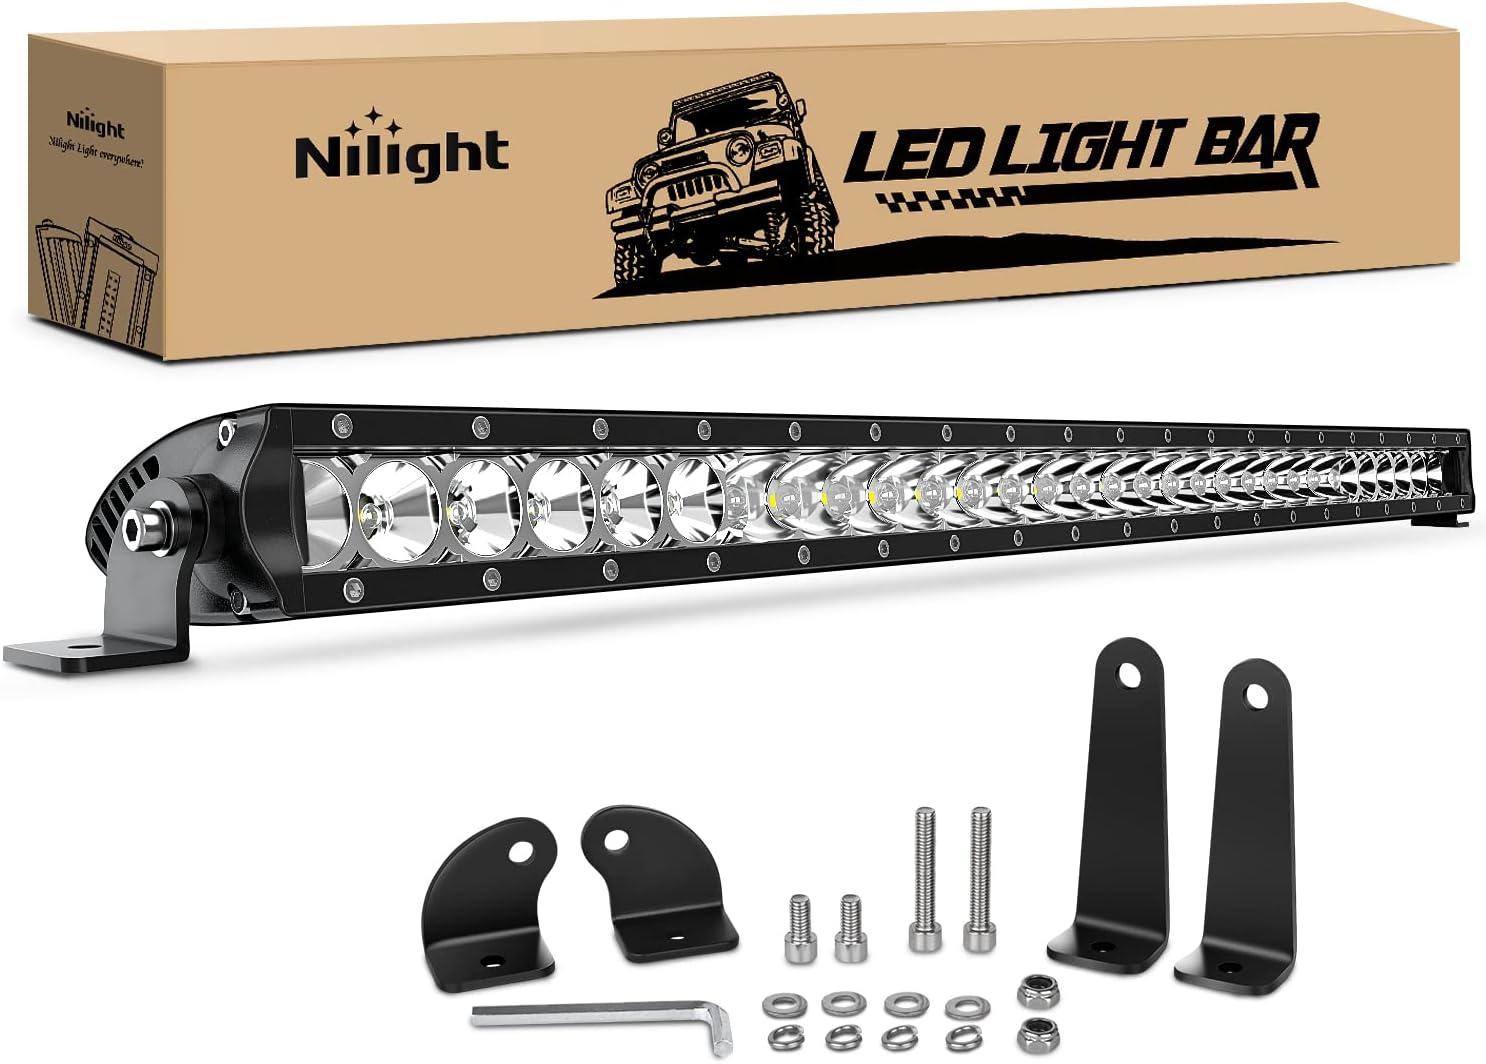
I purchased the Nilight 31 inch LED lightbar and the associated wire harness from Amazon.
Installing the exterior light
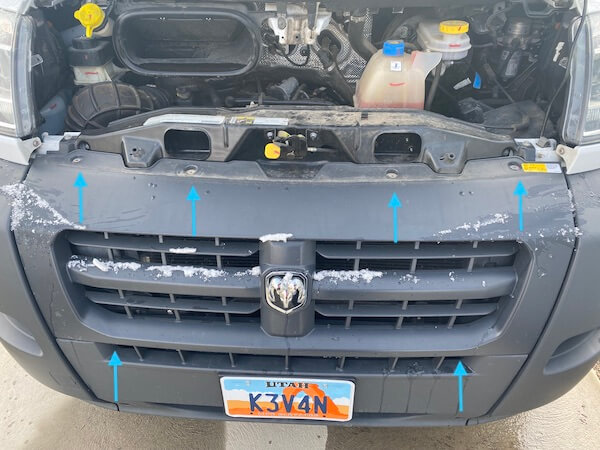
- Remove the upper plastic. There are 4 bolts on top and 2 on the bottom. I used a T30 torx bit to remove all of the plastic pieces. Be careful when prying the plastic away, there are plastic retaining clips along the side and bottom.
-
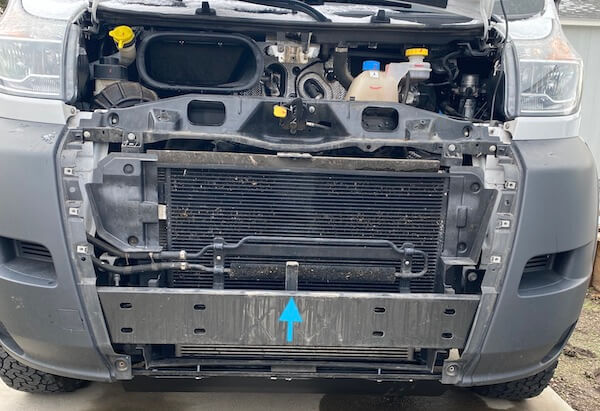
The lower panel is removed with bolts around the entire outside edge, 1 in the center, and 2 underneath the van.
-
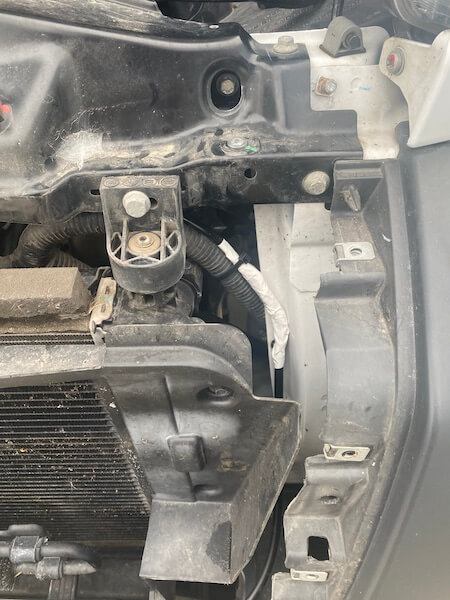
After dry-fitting the lightbar, I noted that the center support is in the way of my light, and didn’t think it would hurt to remove it completely. I cut it off and painted the exposed metal to prevent rusting. I have not yet noticed any instability by removing the center support.
-
Center the lightbar on the bumper, then mark and drill holes large enough to pass the bolts through. I had to get shorter bolts and blindly align a nut underneath the lightbar to secure.
-
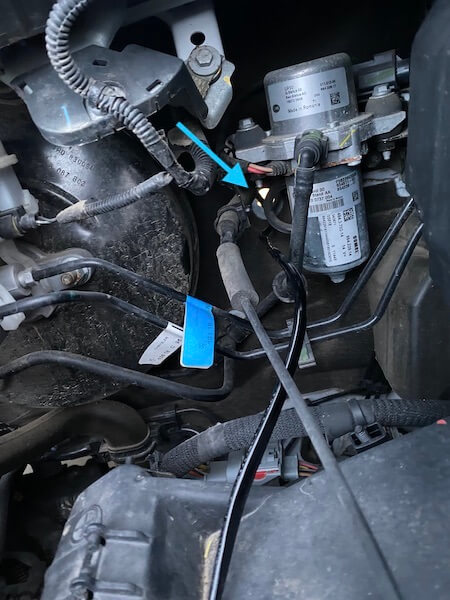
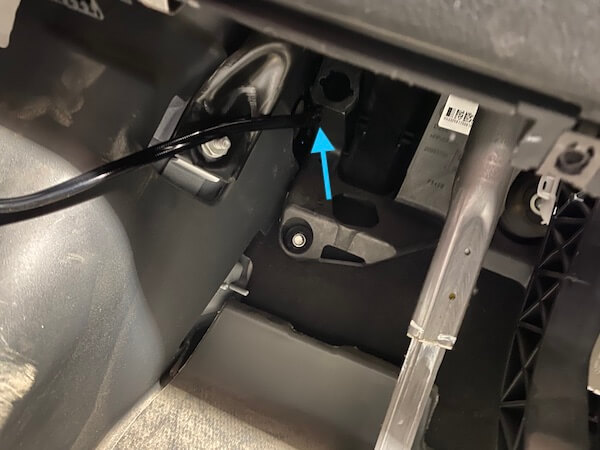
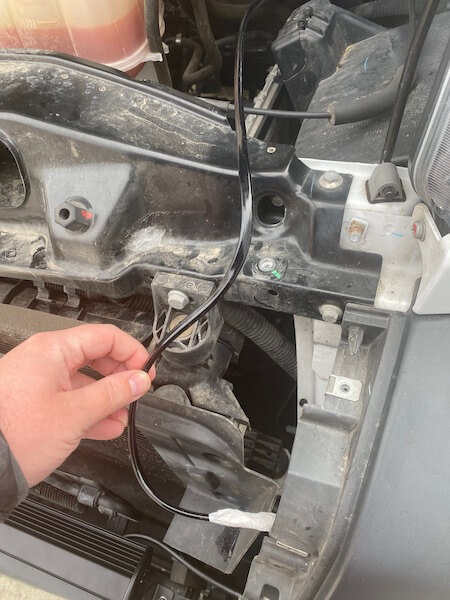
Trace the hood release cable to find passthrough to get the wire inside the cab. I noted there is a rubber stopper blocking a hole I spotted inside the van under the drivers side. It was easy to push the stopper out from the interior side.
Showing open hole to pass switch cable through.
Switch cable passed through the hole.
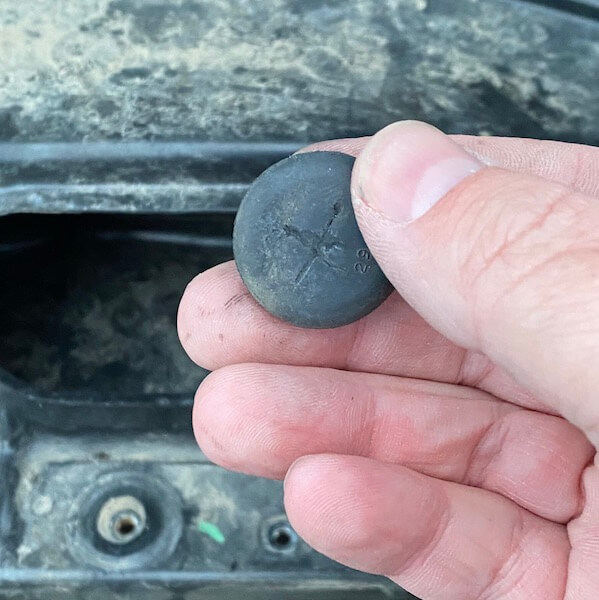
I reused the rubber stopper as a grommet by cutting a hole and running the switch cable through it and pushing it back into place.
-
Connect the lightbar to the cable run for the switch. I used butt connectors with heat shrink, then made sure to cover all of the exposed wire with electrical tape for extra protection.
-
Use zip ties to secure the cable out of the way and ensure it runs neatly to the interior of the cab.

- Cut out all of the vertical plastic pieces in the area for the lightbar. I used a hacksaw for this, but I think a Dremel might have been easier.
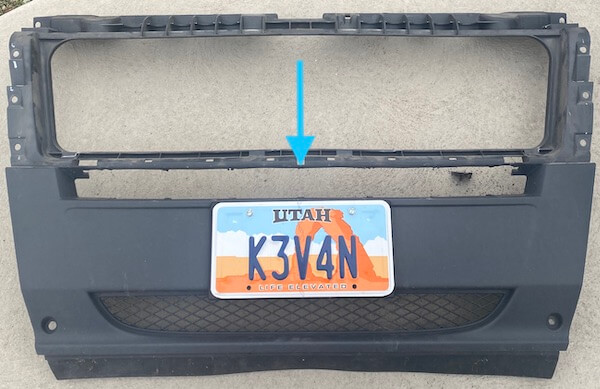
- Test fit on the van to identify where to cut out the plastic to sit around the lightbar mounts.
- Reassemble the front of the van, time to start working on getting the switch installed!
Installing the interior switch for the lightbar
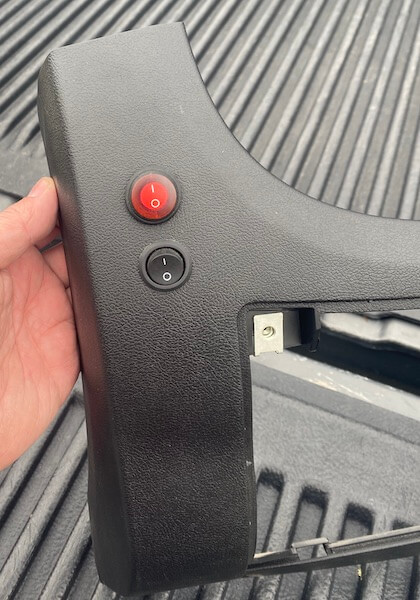
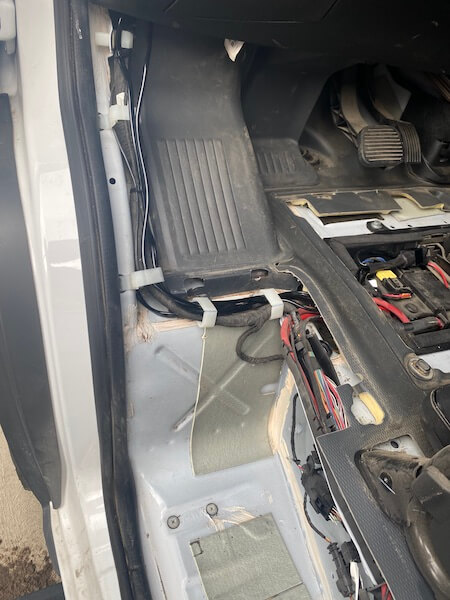
- Using a step drill bit, I made a hole in the panel that sits next to the fuse box. I had previously installed a switch for my DC-to-DC charger, so it felt like a natural place to put my switch.
- I hooked the power directly to the car battery. In the future, I intend to tap a fuse because I don’t personally like having wires directly connect to the battery.
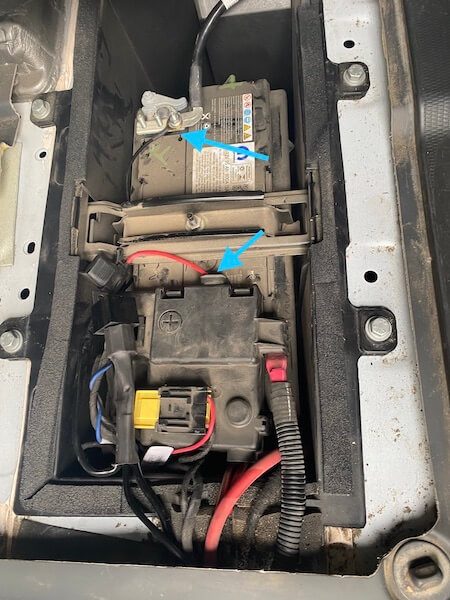
- I tucked the cable in with the wire management to get it to the battery, and zip-tied where the wire management was already full.
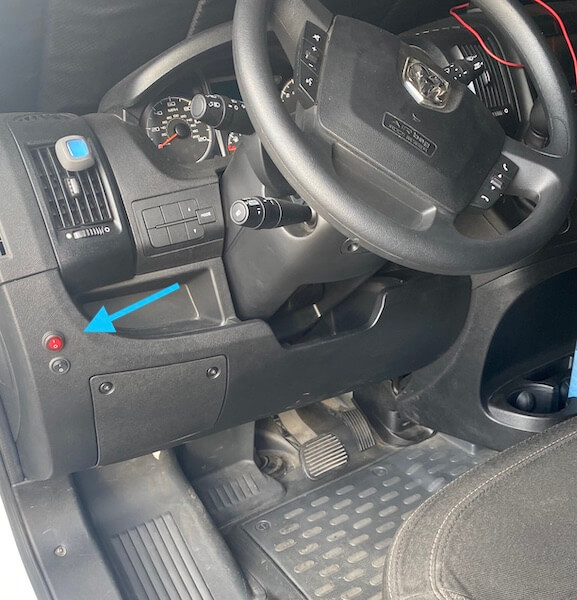
- After putting all the panels back inside the van, you can see the switch is located to the left of the steering wheel.
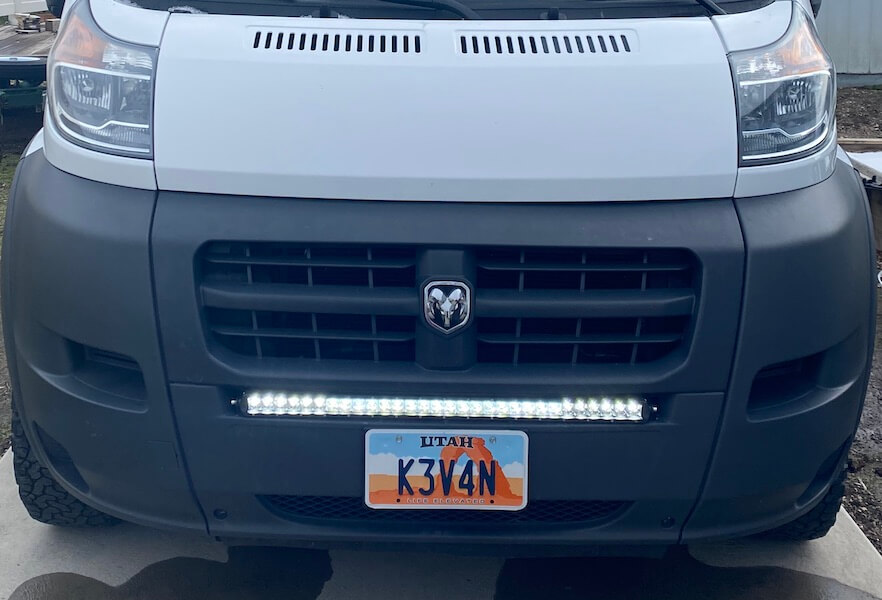
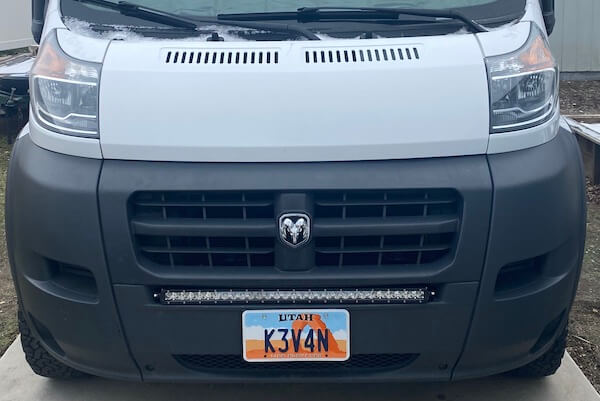
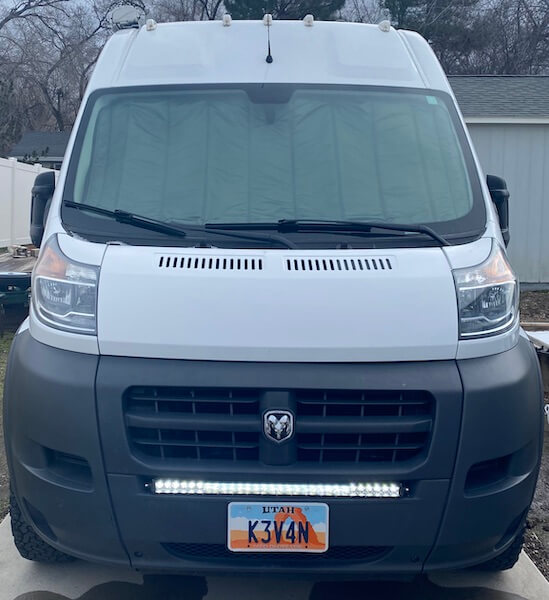
Final product
Bloopers
- I accidentally connected the lightbar with the switch without running the wire out of the way of the hood. That was an annoying discovery.
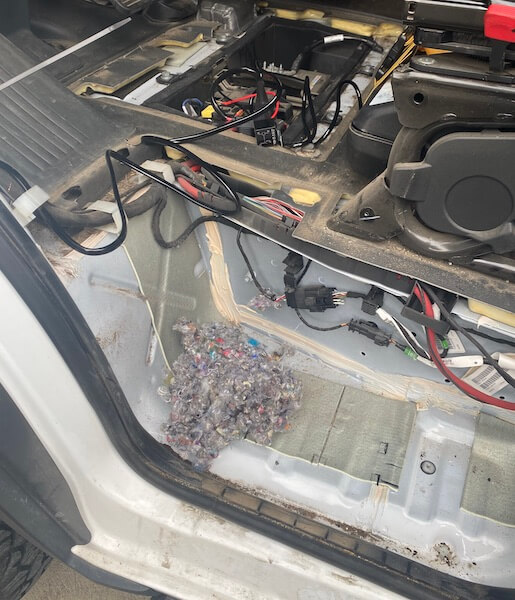
- I found a surprise rodent nest while pulling back panels to run the cable. We had noticed a few signs of a mouse, but couldn’t find it. Now I know for sure I got its nest cleaned up.